How to create a Google app: Free Google Sheets Invoice templates
- Uncategorized
- Stano Dzavoronok
- 5 min read

You can have a quick quoting and invoices using Google Sheets.
With a pinch of creativity, you can add some visual bells and whistles that it doesn’t look dull as or like an ordinary document you might receive from a standard accountant.
Google Sheets are pretty powerful concerning mathematical and financial operations, yet they also allow you to add some style to boring table rows and columns. With a couple of tricks from your sleeve, you can get an aesthetically appealing document, which you will not feel ashamed of when you’ll present it to your clients.
A Little Visual Kick to Boring Numbers
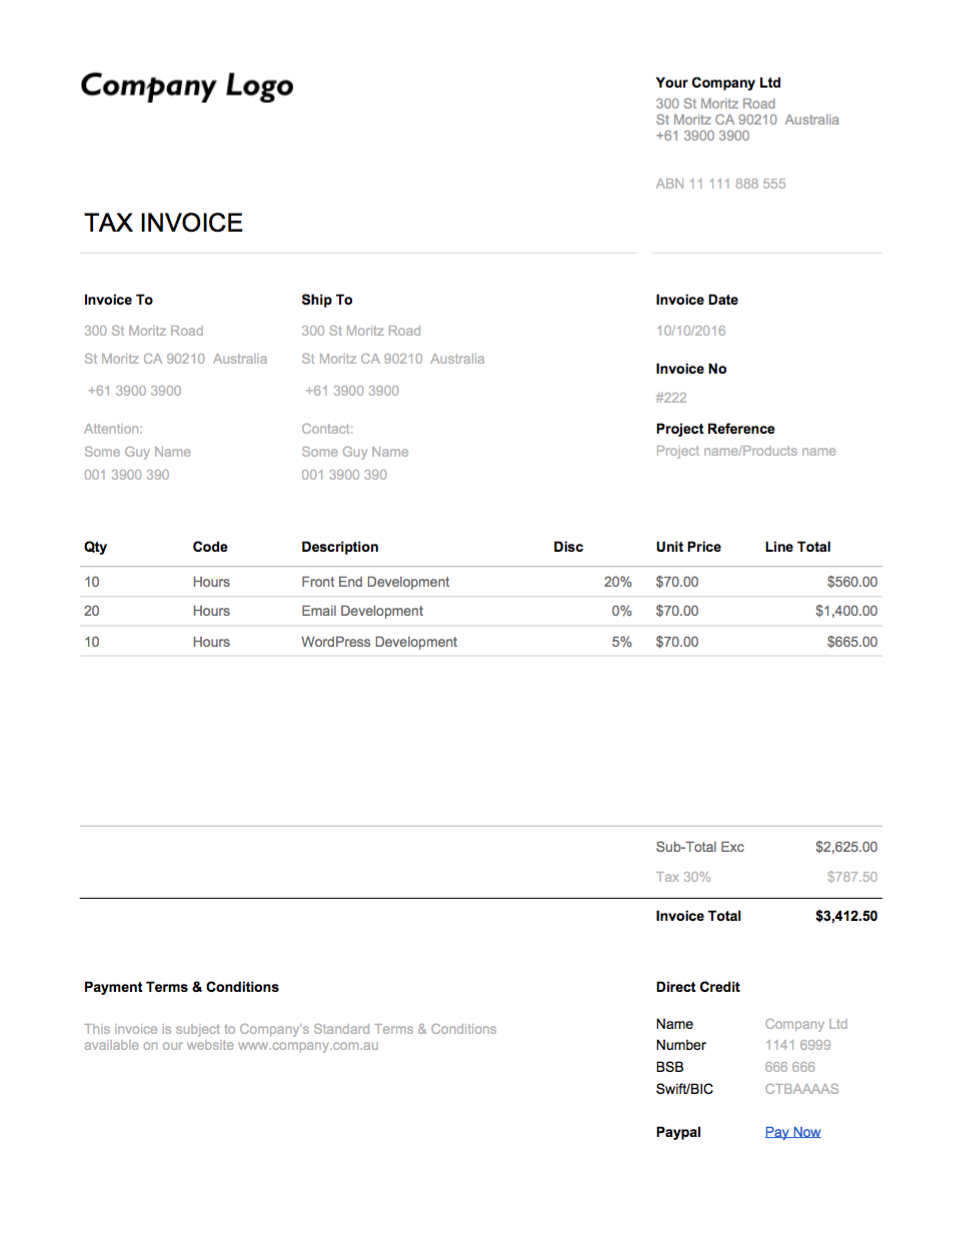
Expect unexpected. Spreadsheets use to look all the same. Rows, columns, numbers, some text here and there. With a bit of creativity and aesthetic feeling, we can create eye pleasing spreadsheets. What’s more, these can be exported as PDF files with active URL links for things such as online payments.
I bet that you have run into a situation where you needed to prepare a project quote or issue an invoice for your services and setting up the whole accounting system appeared too complex a task for you to do. Google offers a variety of handy tools for everyday living tasks. I’ll show you how you can turn Google Sheets into an active Quote, Invoice creating engine with a little visual enhancement.
I have prepared a couple of templates for you to use as a starting point in your future work and fun with your creativity.
Template 1
Template 2
Spreading the sheets
Similarly to Gdoc templates, you can use these spreadsheet templates with a simple mouse click. Pick up any of the templates above, click the “Use the template” link, make a copy of the template and start to use it. Change the information so that these templates are pre-filled with your own information and logo.
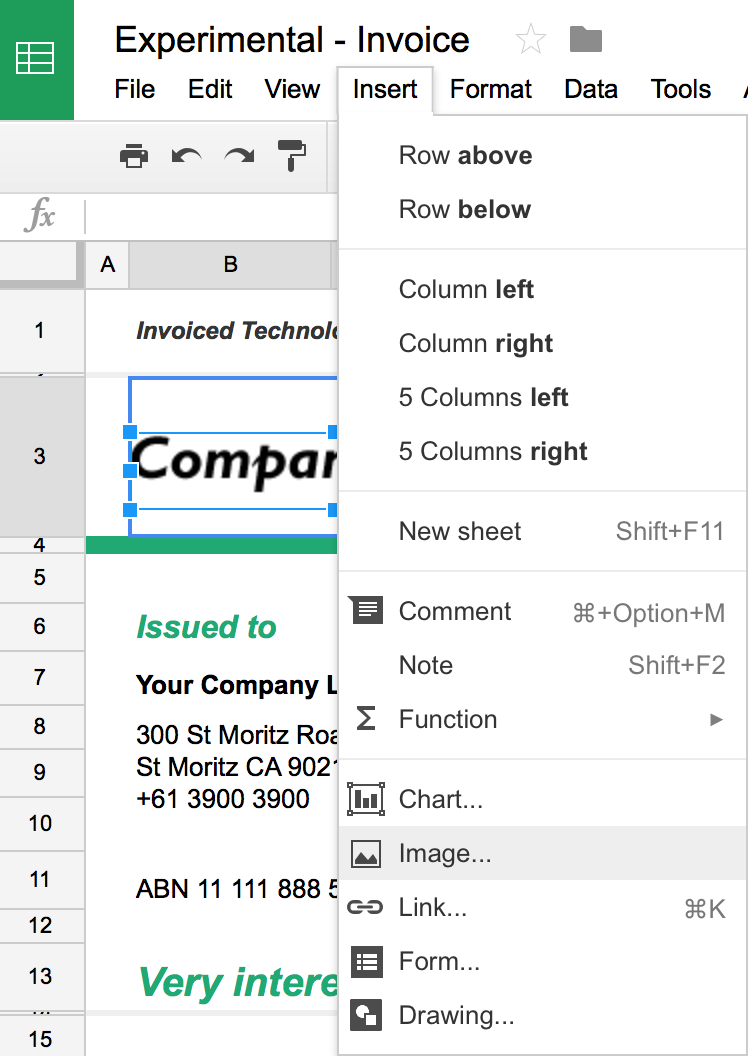
The template contains 3 sheets. Let’s start with the sheet called Doc. I’m going to show you how to replace the logo. Point your mouse cursor on the logo and delete the generic logo. In the top toolbar choose Insert and go down to Image option. You’ll be prompted to choose the source of the image you would like to insert as your logo. Figure 1 shows how to do it.
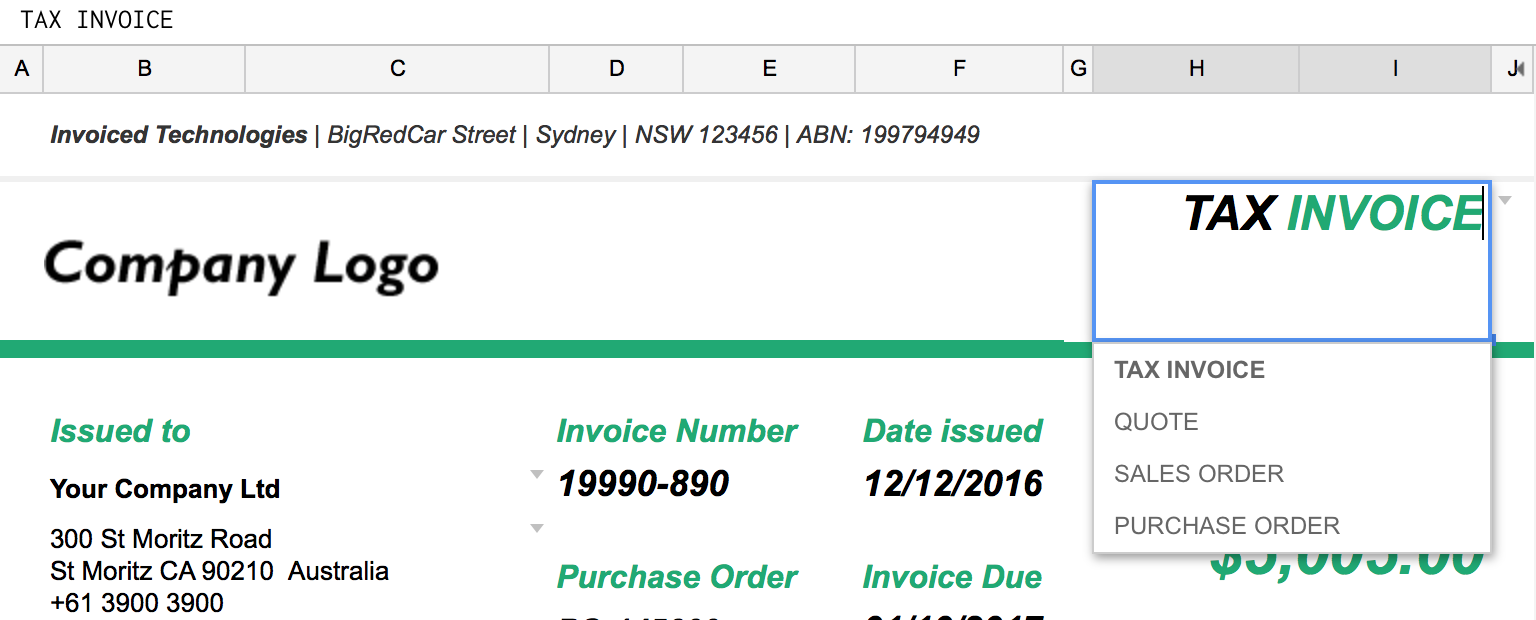
What’s good about this template is that you can change the type of the document with from Tax Invoice into a Quote or Sales Order quickly in a single mouse click. Figure 2 demonstrates how easy it’s possible to do it.
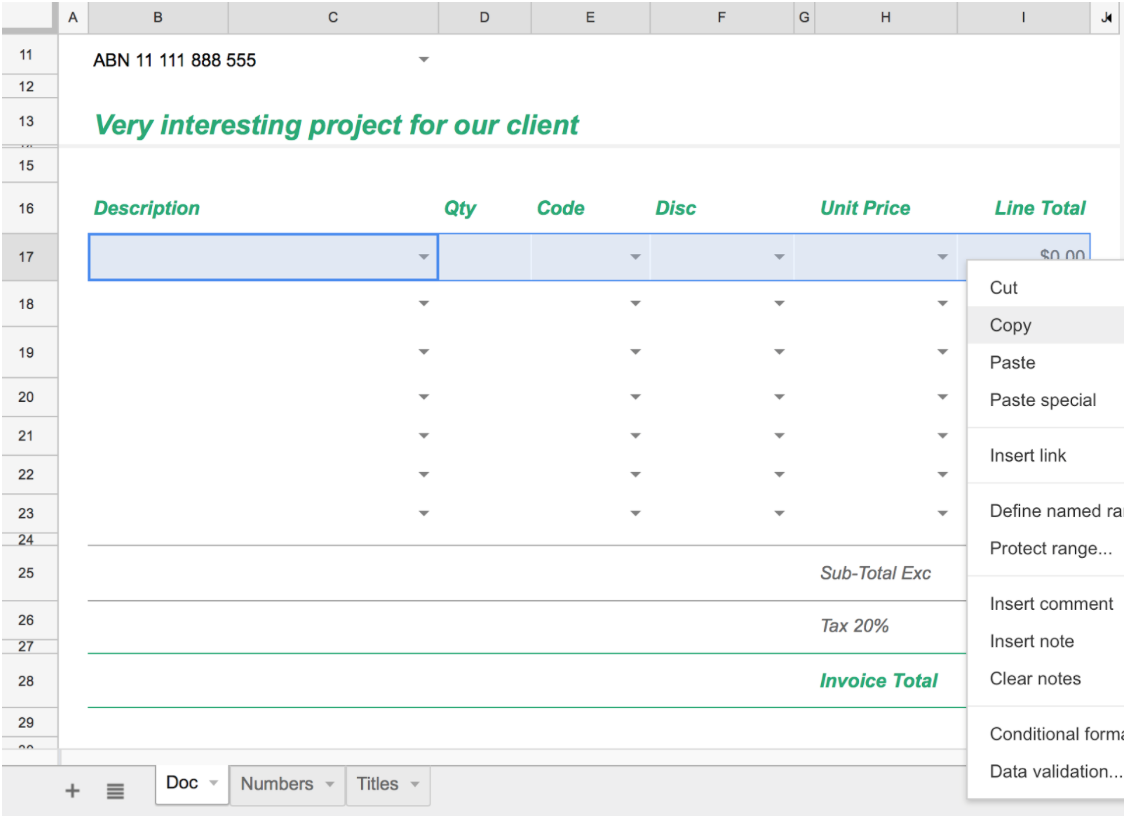
Adding new items requires copy/paste and small adjustments of the fields. Place your mouse cursor in the first column under description and select the columns in the row as it’s shown in Figure 3.
To add new line item place your cursor one row below and paste (ctrl+v/cmd+v) clipboard content into that field. Adjust the fields to your preferences.
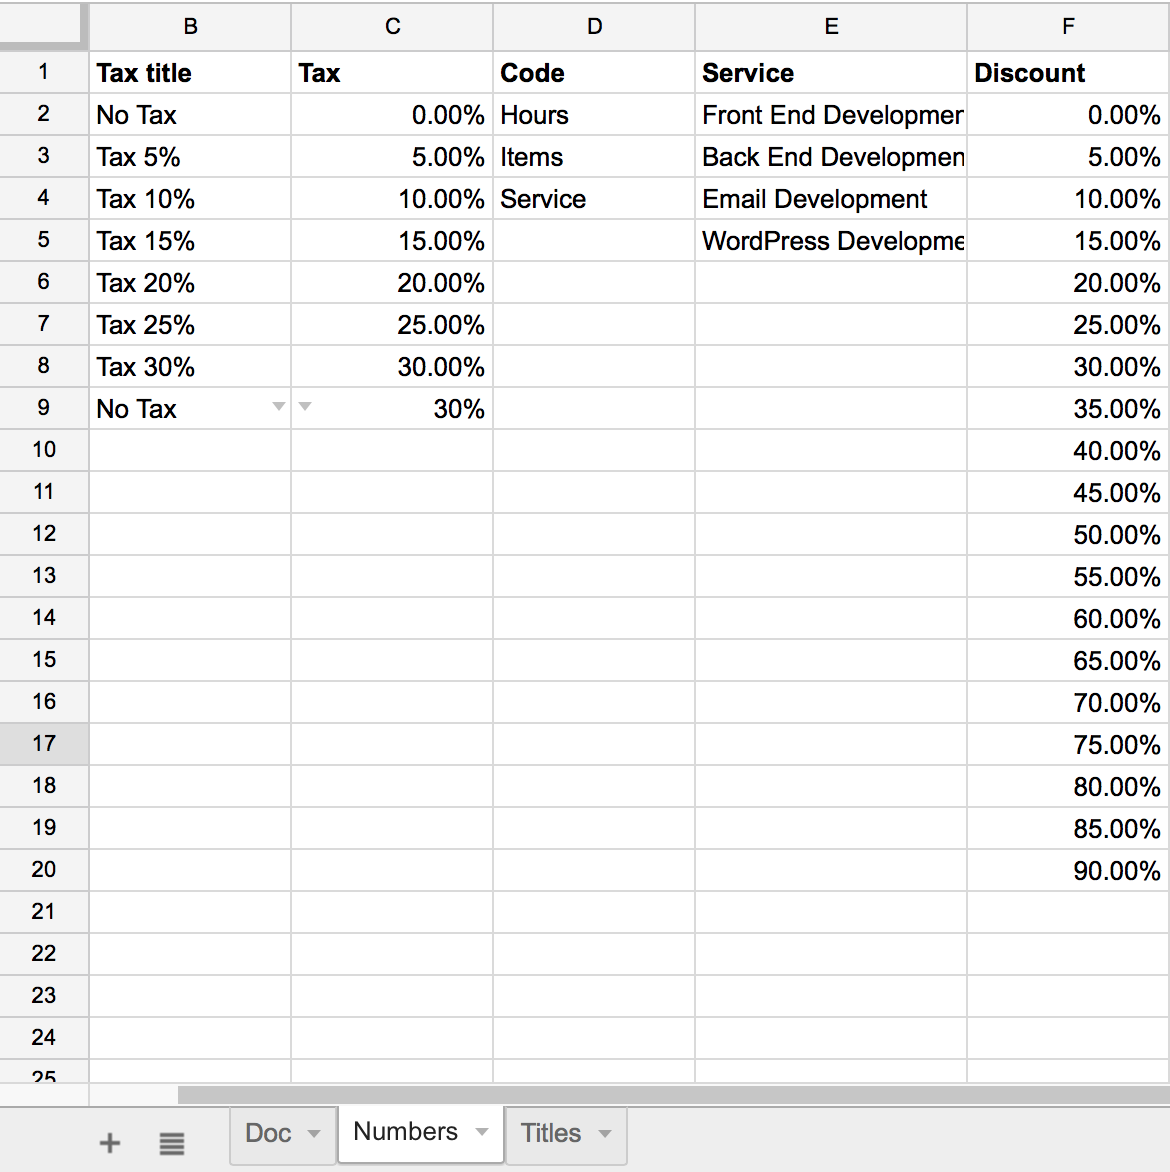
Moving further into the Numbers sheet you’ll get the following screen. Inside this sheet there are multiple options which can be changed to your preferences. You can set up the title of the tax field, and you can configure the tax amount, the invoice item code, the service name and the discount amount. Make sure you match the tax title with the tax amount to avoid any misunderstanding in a later stage.
In our case row number 9 is used for tax title and tax amount definition. Values selected here will appear on Doc sheet and total amounts will be calculated using them in calculation formula. Figure 4 shows the Numbers sheet.
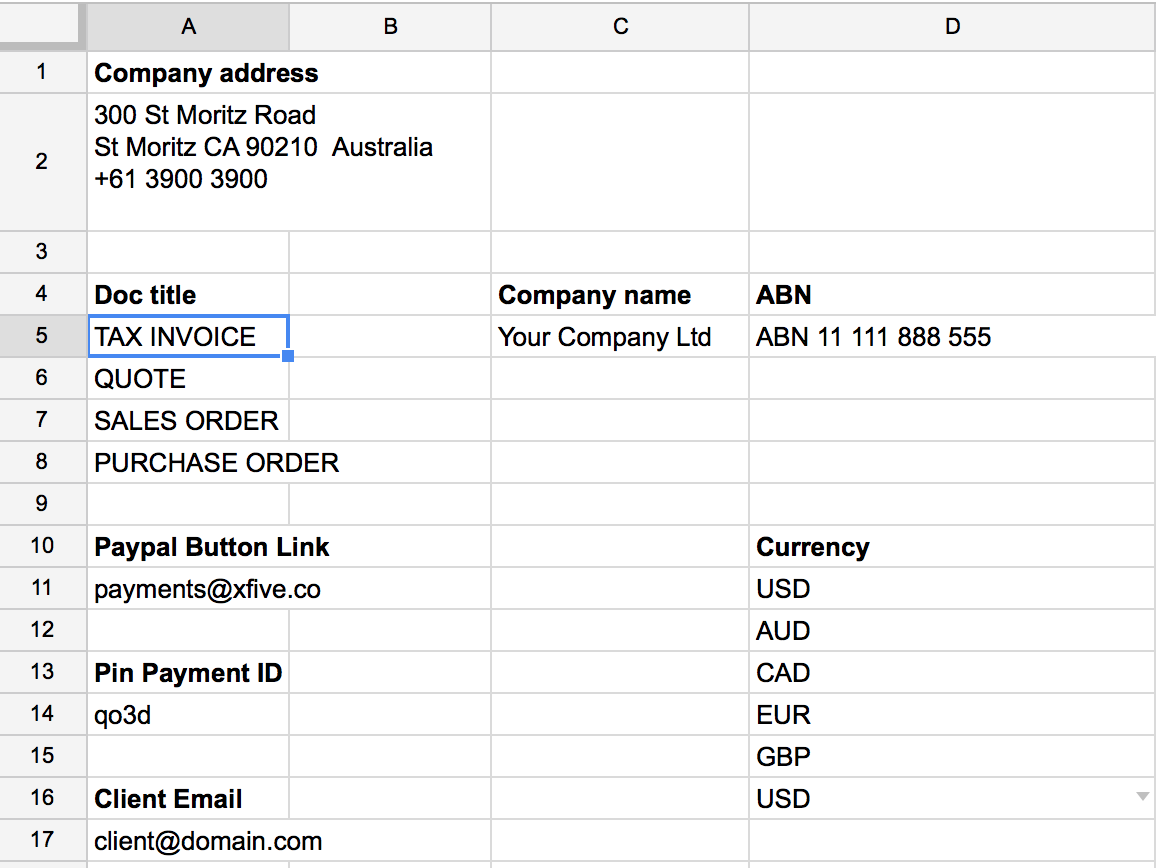
For the textual information displayed on the document, we’ll use Title sheet. You can define your company address, company name, ABN number. Doc type can be defined under Doc title section.
Furthermore, you can specify your PayPal ID to make the PayPal payment button work correctly. For PinPayment clients, there’s an option to define their account ID which ensures that the payment link will work properly. Figure 5 shows Titles sheet.
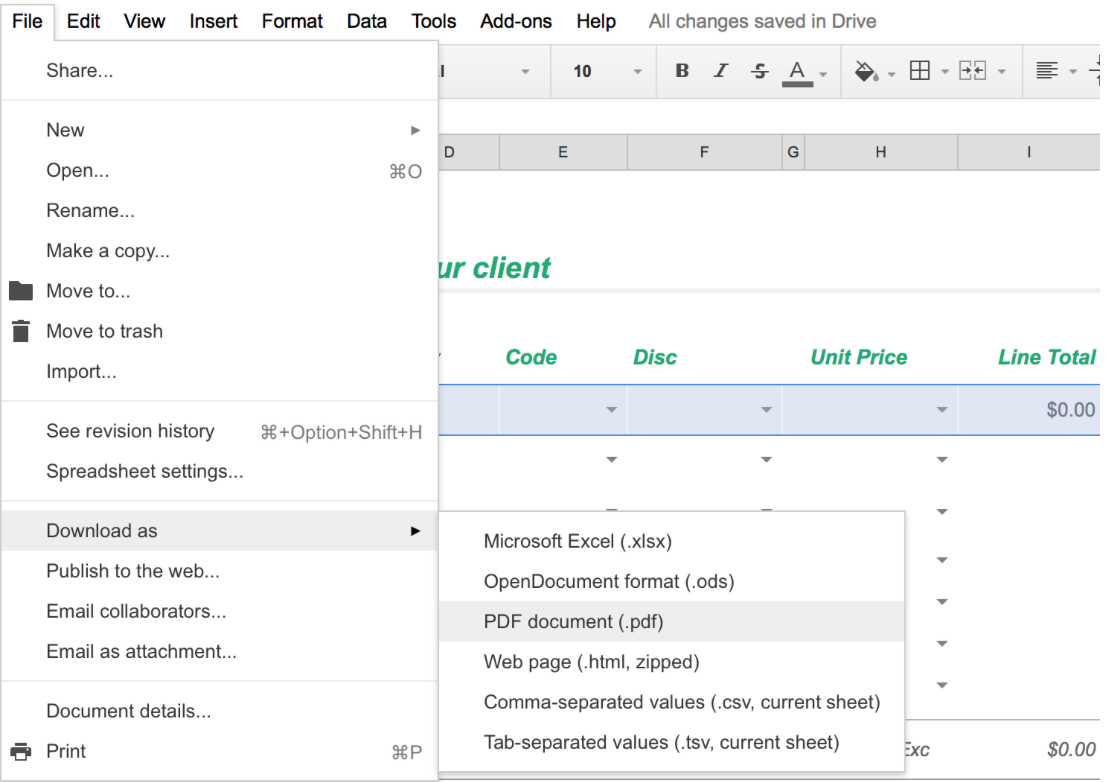
If you are happy with the results and you would like to export it. There are a couple of options. Personally, I prefer the download as PDF option, where you can export your Google sheet as PDF.
This option can be chosen from the File menu > Download as > PDF document (.pdf)
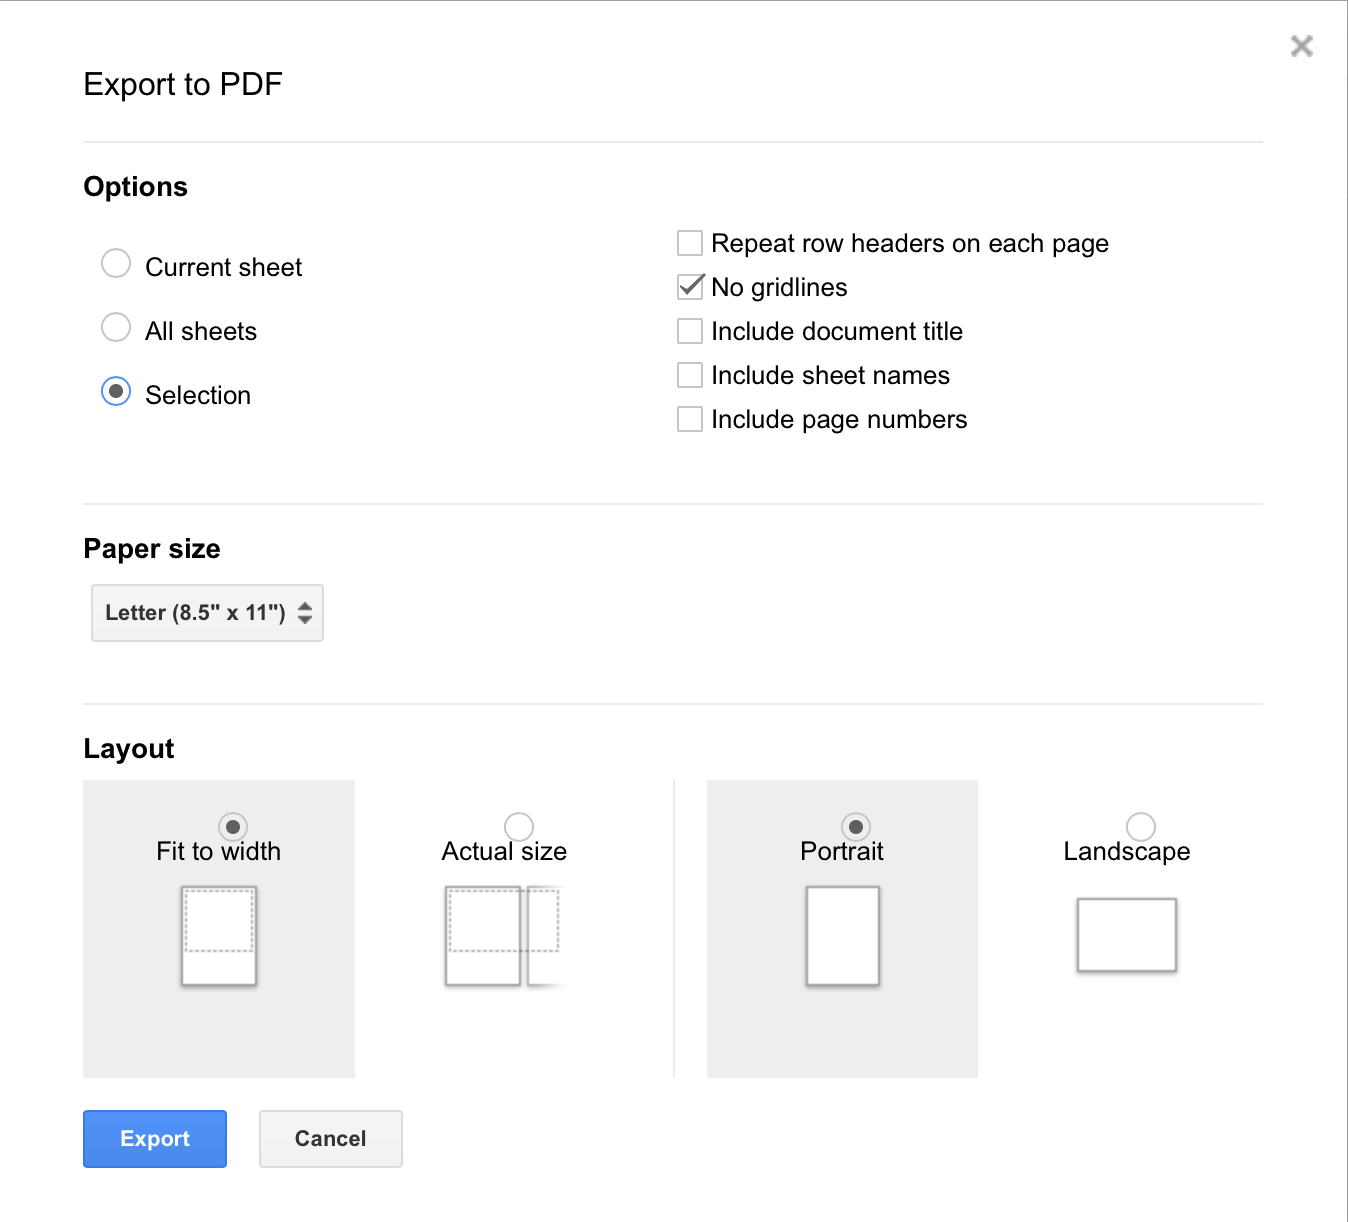
Finally, to make the PDF appear nicely, there are additional settings in Export to PDF screen where you can set up final conditions for the PDF export. Please use the settings displayed in Figure 7.
TIP: Before you’ll export PDF select all rows and columns in Doc sheet. You can do it simply with CTRL + A / Cmd + A keys shortcut.
