Lightning-Fast Social Media Buttons with Counters
- Development
- Lubos Kmetko
- 7 min read

Keep your website lean with the following recipe for fast responsive social media buttons with counters. All with just 1 request and 3kB of code.
Some social media buttons can bloat your website with dozens of requests and hundreds of kB of ‘junk’ code. In our big test of social media buttons the number of requests ranged from 5 (Simple Share Buttons) to more than 50 (Shareaholic), and size from 45kB (Simple Share Buttons) to almost 600kB (ShareThis).
In this tutorial I’ll show you how to keep your website lean and healthy by creating custom social media buttons which are responsive, only take 1 additional request and the overall code size is under 3kB.
Check out this demo page to see what we’ll be cooking together:
You can also browse the project GitHub repository.
Ingredients
To create share buttons for Twitter, Facebook, LinkedIn and Google+, we will need:
- 4 SVG symbols
- 4 share URLs
- 1 call to Sharedcount.com API
- a bit of vanilla JavaScript
- Browserify to put it together (optional)
- a few lines of SCSS to give our buttons a nice presentation
Feel free to experiment with the ingredients according your taste, eg. use jQuery or plain CSS if you prefer those. Just keep SVGs and use SharedCount.com.
Note: Due to Twitter API changes we won’t be able to display number of shares on Twitter. This affects everyone, just in case you’ve noticed some zeroes on the Twitter buttons on your favorite websites recently.
Directions
1) Create SVG icons
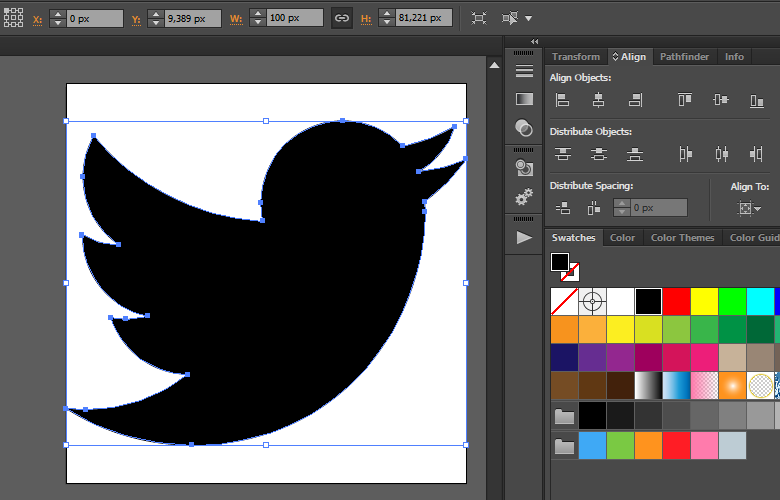
Let’s start by creating SVG icons in Adobe Illustrator CC and adding them to our markup. By using inline SVG we won’t make any additional HTTP requests and will be able to scale the buttons as needed in our responsive designs.
For our demo page, I’ve used the icons from Font Awesome. Use your own icons or different icons set if you want. If you are using Sketch or another tool, use an equivalent technique to create a consistent set of icons.
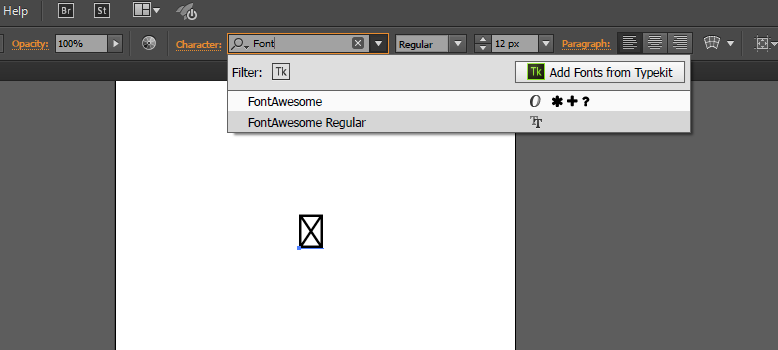
- Download and install Font Awesome font on your computer (.otf and .ttf files are in the fonts folder of the package).
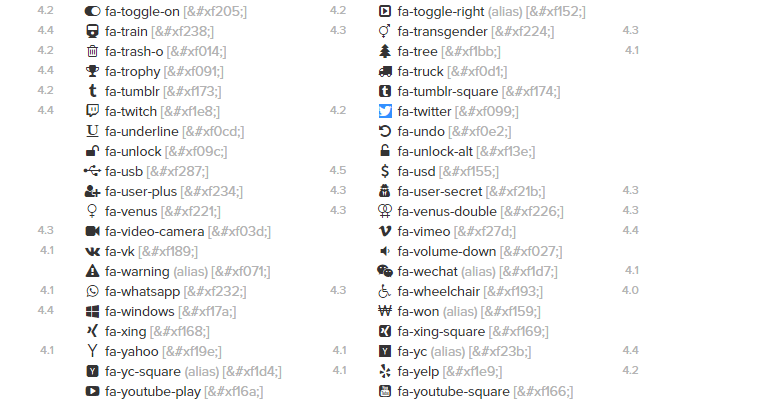
- Go to Font Awesome cheatsheet
- Select and copy the character icon you want


<symbol id="c-icon--twitter" viewBox="0 0 100 81.22">
  <title>Twitter</title>
  <path d="M89.72,29.63c0.06,0.89.06,1.78,0.06,2.67,0,27.09-20.62,58.31-58.31,58.31A57.92,57.92,0,0,1,0,81.41a42.52,42.52,0,0,0,4.95.25,41,41,0,0,0,25.44-8.76A20.53,20.53,0,0,1,11.23,58.69,25.77,25.77,0,0,0,15.1,59a21.7,21.7,0,0,0,5.39-.7A20.5,20.5,0,0,1,4.06,38.2V37.94a20.66,20.66,0,0,0,9.26,2.6A20.53,20.53,0,0,1,7,13.13,58.26,58.26,0,0,0,49.24,34.58a23.19,23.19,0,0,1-.51-4.69,20.51,20.51,0,0,1,35.47-14,40.35,40.35,0,0,0,13-4.95,20.43,20.43,0,0,1-9,11.29A41.05,41.05,0,0,0,100,19,44,44,0,0,1,89.72,29.63Z" transform="translate(0 -9.39)" />
</symbol>
Repeat this for each icon and you should get 4 SVG definitions like in this file.
2) Create links with share URLs
Now we need to create links so the actual sharing functionality works when a user clicks on our buttons. Each social network has their own sharer URL, check out the list of social share URLs.
- Create an unordered list with A elements inside
- For each button define its respective share URL
- So that the sharing works on any page, we need to provide a URL parameter to the share links. Below I’ve done it in JavaScript by replacing a placeholder in the link, but ideally you should generate and encode each URL on your backend so sharing works with JavaScript turned off too.
function updateShareUrls() {
  var url = encodeURIComponent(location.href);
  var buttons = shareButtons.querySelectorAll('a');
  for (var i = 0; i < buttons.length; i++) {
    var new_url = buttons[i].getAttribute('href').replace('#url', url);
    buttons[i].setAttribute('href', new_url);
  }
}
3) Use and style SVG icons
When we have the share links ready, we will use our previously created SVG symbols to display social media icon inside the buttons. The final HTML code of the button will look like:
<a href="http://www.facebook.com/sharer/sharer.php?u=#url" class="c-share-buttons__button" title="Share on Facebook" target="_blank">
  <svg class="c-share-buttons__icon">
    <use xlink:href="#c-icon--facebook"></use>
  </svg>
  <span class="c-share-buttons__counter js-fb-count"></span>
</a>
The styling is up to you, you can check out the SCSS for the demo page for some inspiration. (In case you are curious about those funny class names, I’ve used Harry Roberts’s ITCSS here.)
In step 1 we created consistent SVG symbols so the styling should be relatively easy.
4) Display number of shares
We’re almost there! All that’s left is to query SharedCount.com API for actual number of shares and display the numbers in our counter elements. For this we’ve added an additional HTML element with a unique class name for each button. We will display this element only when the number of shares is higher than zero.
<span class="c-share-buttons__counter js-fb-count"></span>Sign up to SharedCount. With a free account, you have 1000 queries a day, if you later log in with Facebook it will increase your daily quota to 10,000 queries.
Go to Account / Domain Whitelist and enable domain whitelisting. Enter your domain to avoid someone using your API key.
Grab your API key and use it in a function for querying SharedCount. Here I used a simple XMLHttpRequest request to query API and parse the response:
function querySharedCount() {
  var apikey = "enter your API key here";
  var url = encodeURIComponent(location.href);
  var request = new XMLHttpRequest();

  request.open('GET', '//free.sharedcount.com/?apikey=' + apikey + '&url=' + url, true);

  request.onload = function() {
    if (this.status >= 200 && this.status < 400) {
      var data = JSON.parse(this.response);
      displayCount('.js-fb-count', data.Facebook.total_count);
      displayCount('.js-linkedin-count', data.LinkedIn);
      displayCount('.js-googleplus-count', data.GooglePlusOne);
    }
  };

  request.send();
}
Next we display the number of shares, but only display the counter element if the number of shares is bigger than zero.
function displayCount(selector, count) {
  var element = document.querySelector(selector);

  if (element) {
    // Only display counts bigger than zero
    if (count && count > 0) {
      element.innerHTML = count;
      element.classList.add('is-visible');
    }
  }
}
Check the whole JavaScript code here. I’m using Browserify to build our module, but use whatever JavaScript approach you are comfortable with. jQuery implementation is shown at the SharedCount website.
Don’t forget to load your JavaScript asynchronously so it doesn’t block your page rendering.
Result
Check out the result at our demo page. If we only count additional requests and code (assuming you will have JS and CSS in your project anyway), we get the following numbers:
Requests
- 1 request to SharedCount – 0.17kB. The response is very fast because the results are cached (20 minutes by default).
File Size
Counting only additional code needed for building the buttons:
- HTML (unminified, gzipped) – 1.3kB
- CSS (minified, gzipped) – 0.7kB
- JS (minified, gzipped) – 0.8kB
Total: 2.8kB
So there you have it – small, fast social media buttons you can style to match your overall UX.
Are there any drawbacks to this approach? Certainly there are some:
- SharedCount is currently limited to the following services:
- StumbleUpon
- SharedCount is not free for more than 10,000 queries a day, but I assume that if you have bigger traffic than that, you’ll be able to pay for the service.
- You don’t get any advanced analytics like some other solutions provide, so you have to rely on your other analytics resources (like Google Analytics).
- Updates to the count numbers are not instantaneous because results are cached at SharedCount. However, you can set up custom cache time or disable caching altogether on paid plans.
If this is not a big deal to you, I hope that this tutorial will help you to create leaner and healthier websites. Bon appetit!


